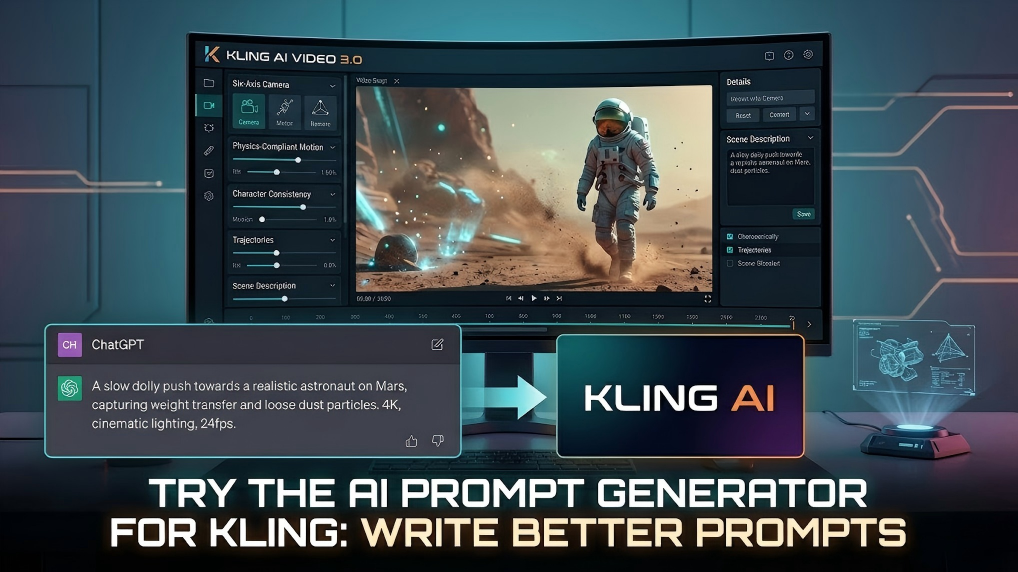
When using AI video creatiaon, having your settings correct can make or break your end product. Imagine tuning a guitar here; every parameter has to work in harmony to produce something that sounds or, in this case, looks fantastic. FPS and motion intensity take central stage here, alongside other higher-end AI video creation settings that have a direct effect on your AI video quality. When it comes to dialing these in, Kling AI provides 1080p/30 fps output to help you land reliable results faster.
What Are Kling AI Video Quality Parameters (FPS, Motion, Resolution)?
Coming to know these foundational elements is your beginning step to producing better videos. Each parameter serves a certain function in how your end product turns out.
FPS Frame Rate Basics
FPS, or frames per second, is how many images your video displays each second. Feature films are mastered at 24 fps per Digital Cinema standards; broadcast TV commonly uses 29.97/59.94 fps in 60 Hz regions and 25/50 fps in 50 Hz regions; major platforms like YouTube accept uploads at 24/25/30/48/50/60 fps.
Higher FPS can look smoother—but it also creates larger files and requires more processing.
Motion Intensity Definition
Motion intensity determines how much activity and change occur between frames in your AI video creation. High motion intensity translates to a lot of action, fast cuts, and energetic scenes. Low motion intensity produces quieter, more static shots. Note: different AI tools name and implement this differently (e.g., “motion blur,” “temporal consistency,” or “optical-flow strength”). On Kling, newer 2.x models emphasize smoother motion and frame-to-frame consistency, which helps at moderate intensity settings.
Resolution Settings
This one's super simple – resolution is what makes your video look sharp and detailed. You usually see stuff like 1080p, 4K, and sometimes even 8K. The higher the resolution, the clearer the picture, but it also means longer processing times and bigger files.
Having a grasp on these basics sets you up to make informed decisions about your higher-end settings of AI video generation.
Why Do FPS And Motion Intensity Matter For Kling AI Video Quality?
And these two elements act like your AI video quality backbone since they influence anything ranging from how smooth your clips will be to how powerful your processor will be.
FPS Impacts
FPS is not a technical figure – it's what makes your video natural or uncomfortable to watch. If your FPS is too low, your viewers will spot jerky movement that disrupts your immersion. If it's too high, you can end up with an unnatural "soap opera effect" making everything hyperreal. Film employs 24 FPS to achieve a dreamy filmic look, TV shows use 30 FPS for realism purposes, and gameplay content employs 60 FPS to smooth out rapid action. Increasing FPS makes your computer work harder and generate larger files, which hits upload times and storage expenses.
Motion Intensity Affects
Motion intensity dictates how your AI manages movement and interacts with other advanced features to produce your end AI final video quality. When objects move fast, motion intensity regulates how much blur is applied – high levels produce realistic motion blur, but lower levels keep everything sharp and potentially unnatural. High intensity permits broader changes between frames and can produce a stilted image. Lower levels produce smoother, cinematic changes between frames but can be slower due to increased processing demands.
It's the right mixture between FPS and motion intensity that makes a formula for professionally appearing AI video creation.
How to Choose FPS And Motion Intensity In Kling AI?
Selecting the best settings requires a process-oriented approach considering your specific needs, constraints, and aims. Savvy parameter selections distinguish amateur efforts from professional-grade production.
Step 1: Analyze Your Content Requirements
Start by deeply understanding what you're creating. A cinematic short film needs different settings than a social media ad or educational tutorial. Consider the mood you want to create – dramatic action sequences benefit from higher FPS and motion intensity, while contemplative documentary footage works better with lower, more stable settings. Think about your story's pacing and how technical parameters can support your creative vision. Kling’s 16:9/9:16/1:1 support makes it easy to align settings with platform intent from the outset.
Step 2: Technology Limitations Assessment
Be mercilessly frank about your hardware constraints. Look at your GPU memory, CPU power, available RAM, and storage capacity. Conduct benchmarking tests at varying settings to know where your system's breaking point lies. Account for your internet connection speed if operating cloud-based AI video creation software. Include your electricity expenses for prolonged rendering operations – higher settings have a heavy toll on utility bills in the long run.
Step 3: Distribution Strategy Definition
Different platforms have different technical expectations:
- YouTube: Platform (not “YouTube Premium”) supports uploads at 24/25/30/48/50/60 fps; choose bitrates per resolution/FPS. YouTube Premium doesn’t change creator upload capabilities—it’s a viewer feature (ad-free, downloads, etc.).
- Instagram Reels/Stories: Reels require a minimum frame rate of 30 fps and a minimum resolution of 720p; 9:16 at 1080×1920 is recommended. Story ads list 1080×1920 recommended and 600×1067 minimum.
- TikTok: In-Feed creatives: vertical 9:16 with minimum 540×960; TikTok’s spec page lists video duration up to 10 minutes for these placements.
- LinkedIn: Official spec recommends 30 fps and supports vertical 9:16 up to 1080×1920.
Step 4: Production Schedule Planning
Your most limiting factor will typically be time. Your higher quality AI settings in video will cause rendering times to go up exponentially. Your 30-minute render at medium settings might be a 4-6-hour render at max parameters. Provide buffer time in your schedule for your test renders and editing. Ask yourself if you need real-time preview or can accept a longer wait between refreshes in a process.
Step 5: Budget Resource Allocation
High-end AI rendering settings use up computer power that translates to actual dollars. Cloud rendering is paid for in increments of processing time and complexity. Local rendering has a toll on your gear's life expectancy and power usage. Put your quality ambitions against realistic budget limitations and decide which parameters yield the greatest perceivable quality investment return.
Employing this comprehensive approach ensures that your selections for parameters align with botgh your imagination concepts and practical limitations.
How to Optimize FPS And Motion For Different Scenarios In Kling AI?
Various pieces of content need entirely distinct methodologies of optimization. Recognizing these subtleties allows you to produce results that fulfill certain requirements of both the audience and the platforms.
Step 1: Cinematic Content Optimization
For movie-style material, begin at 24 FPS in order to capture that old-school cinema quality audiences demand. Employ moderate motion intensity (60-70% max) to keep quality high while still retaining key details. Optimize for 4K resolution and depth of color rather than sheer number of pixels. Test settings with varying lighting setups because interior dialogue requires a different level of motion intensity compared to exterior action scenes. Kling 2.5’s smoother motion handling helps preserve cinematic feel at moderate intensity.
Step 2: Social Media Parameters
Platform-specific strategies apply to social media. Use 30 FPS at high motion intensity (80-90%) in vertical format 9:16 to create algorithm-friendly attention getters on TikTok and Instagram Reels. Facebook and YouTube Shorts can tolerate a little bit of variety – trial and error with 60 FPS on gaming clips, but cap 30 FPS on lifestyle pieces. Make sacrifices on fast load times, but never quality, because mobile users only have a finite amount of bandwidth.
Step 3: Educational And Training Content
Instructional videos need clear image acuity and smooth panning. Use 30 FPS and moderate motion intensity (40-60%) to maintain readability levels and easy-to-follow demonstrations. High definition (1440p or 4K) is preferred over high frame rates because students pause and scrutinize details dramatically.
Step 4: Gaming And High-Action Content
Gaming requires a minimum of 60 FPS; competitive gaming requires 120 FPS if timing is a factor. Employ maximum motion intensity to freeze fast motion without a blur. Optimize to accept bigger file sizes since your viewers demand high-end quality and usually have high-speed connectivity.
Step 5: Viewing Environment Customization
Mobile viewing has a higher motion intensity to keep viewers interested on small screens. Desktop viewers enjoy inherent details that mobile screens can't render. Smart TV viewers demand cinema-grade parameters but watch at further distances where intense detail is less relevant.
It's about testing your content on actual target devices in front of actual users rather than optimizing based on theoretical specs.
What Mistakes to Avoid With FPS And Motion In Kling AI?
Even seasoned producers make these common mistakes that can be a time waste and ruin your ultimate AI video quality.
Set Parameters Too High
Your biggest mistake is thinking that maximum settings provide maximum quality. All too often, you'll only be getting longer rendering times and larger files without any perceivable difference in the final product.
Hardware Limitation Oversights
Forcing your system past its limits can cause system crashes, corrupted files, or sluggish processing. Recognize your limits and work within them.
Improper Format Choices
Selecting an inappropriate format to use will invalidate all parameter tuning performed. Ensure that your format is appropriate to use and matches your required system/proxy site requirements.
Unrealistic Quality Expectations
Occasionally, the source material or project limitations will not allow for a Hollywood-grade finish. Make realistic expectations considering your resources and timeframe. By sidestepping these traps, you can keep yourself out of trouble and construct superior workflows to use on subsequent projects.
FAQ — Kling AI FPS & Motion
Q1: What’s The Safest FPS Setting For Beginners Using Kling?
Honestly, starting with 30 FPS is a solid choice for newbies. It’s a nice mix of smooth motion and file sizes that won’t freak you out, plus it works on pretty much any platform or device you’re using. This frame rate won’t put too much pressure on your hardware and lets you play around with other cool AI video settings. Once you get the hang of 30 FPS, you can check out 24 FPS for that movie vibe or bump it up to 60 FPS for some high-energy scenes. Kling’s default 30 fps pipeline aligns well with short-form platforms.
Q2: By How Much Does Motion Intensity Increase Processing Time In Kling?
There’s no fixed multiplier like “200–400%.” Higher motion-blur quality (e.g., more samples, larger shutter angles) does increase render time, but the impact depends on effect settings and hardware.
Q3: Can You Get Pro Results In Kling Without Maxing Every Setting?
Yes – professional-quality AI videos are a matter of savvy parameter choices rather than maximum settings. Several successful producers use medium settings matching their material type and audience needs. Lower motion intensity with optimally set FPS can produce a superior quality product on occasion compared to maxing all settings. Emphasize suitability and consistency rather than maximizing all sliders. Kling 2.5’s improvements in motion realism and prompt adherence make moderate settings especially effective.
Start Making Pro-Level Videos Today!
It takes practice to become adept at FPS, motion intensity, and other advanced-level AI video generation settings, but it's a good investment in the quality of your AI videos. Start at a beginner level, methodically test things out, and feel free to adjust settings based on what a project has taught. Want to upgrade your video? Put these strategies to use on your next production and see how big a difference making those adjustments can create. Your viewers will fully notice the upgrade, and you'll feel a lot better working on those challenging video creation tasks.