Lighting affects where the eye lands and how much depth a scene carries. Good image lighting fade effect AI prompts make that control more specific by defining direction, falloff, color, and shadow strength. The 15 examples below cover soft light, golden hour, cinematic contrast, neon, and backlighting, with practical ways to refine these effects using Kling IMAGE 3.0.
What to Include in an AI Lighting Fade Prompt
Most pic lighting prompts only need a few clear cues: where the light comes from, where it lands, and how it fades across the scene. A simple AI image prompt formula can help you organize those details before adding more specific lighting language.
- Light Source: Name the source, such as sunlight, a window, lamp, or neon sign.
- Direction: Explain where the light enters and which part of the subject it reaches first.
- Intensity and Shadows: Describe the brightness and how deep or soft the shadows should feel.
- Color and Temperature: Use warm, cool, neutral, or a specific hue to set the tone.
- Falloff: State how the light fades, whether gradually, sharply, or toward a particular edge or area.
15 Image Lighting Fade Effect AI Prompts to Try
Start with the look you want. These 15 AI lighting prompts cover soft daylight, golden hour, cinematic shadow, neon color, and backlighting. They can also serve as starting points in an AI art generator when you want to push the lighting toward a more stylized look.
Soft Light Fade Prompts
Soft light works best when the shift into shadow feels gradual. Window light and overcast daylight are useful starting points for this look.
1.Window Portrait
| Prompt: A woman seated beside a north-facing window, diffused daylight entering from the left and falling away gradually across her shoulder, soft shadow on the far cheek, warm neutral tones, calm and unhurried mood. |
2.Lifestyle Still Life
| Prompt: Morning light enters from a window on the right, catching a half-finished cup of tea before fading across the kitchen table. Keep the shadows gentle and the room quiet and lived-in. |
3.Interior Scene
| Prompt: An empty reading chair in the corner of a room, overcast daylight from a single tall window, brightness falling off smoothly toward the darker back wall, low contrast, still and restful. |
Golden Hour Fade Prompts
Golden-hour scenes depend on the path of the low sun. Mention where it enters the frame and how the warm light gives way to cooler shadow.
4.Outdoor Portrait
| Prompt: A man standing in an open field at golden hour, low sun behind and to his right, warm light wrapping his shoulder and fading into cooler shadow across his chest, hazy air, nostalgic mood. |
5.Landscape
| Prompt: A coastal path at sunset, warm orange light striking the tops of the grass and fading into deep blue shadow at ground level, long soft shadows stretching toward the camera, tranquil evening atmosphere. |
6.Interior Golden Hour
| Prompt: A living room in late afternoon, sunlight entering through a west-facing window and stretching across the floor before fading at the doorway, dust visible in the beam, warm and quiet. |
Cinematic Light Fade Prompts
Give the scene a clear key-light direction, then decide how quickly it should drop into shadow.
7.Character Close-up
| Prompt: A detective standing in a doorway, hard key light from one side, brightness falling off sharply into shadow across the opposite half of his face, deep black background, tense and restrained mood. |
8.Interior Wide Shot
| Prompt: One overhead fixture lights the middle of a long hospital corridor. Let the pool of light fall away into darkness at both ends, with cool gray tones and a stark clinical feel. |
9.Concept Art
| Prompt: A lone figure on a stone bridge, cold moonlight from above and behind, illumination fading rapidly into fog on either side, high contrast, ominous and cinematic. |
Neon Light Fade Prompts
Neon is as much about spill and reflection as the sign itself. Show where the color lands, what catches it, and where the glow disappears.
10.Street Scene
| Prompt: A rain-soaked alley at night, magenta neon from a sign on the left fading into cyan reflections on the wet ground, darkness closing in at the frame edges, cyberpunk atmosphere. |
11.Neon Portrait
| Prompt: A portrait lit by a purple neon tube just out of frame, colored light striking one side of the face and dissolving into near-black on the other, faint blue fill, moody nightlife feel. |
12.Interior Glow
| Prompt: An empty arcade after closing, blue and pink screen glow fading into unlit aisles, colored light pooling on the floor, quiet and futuristic. |
Backlight and Rim-Light Fade Prompts
Backlight can leave only a thin rim around the subject or push the figure closer to silhouette. The amount of visible detail changes the whole effect.
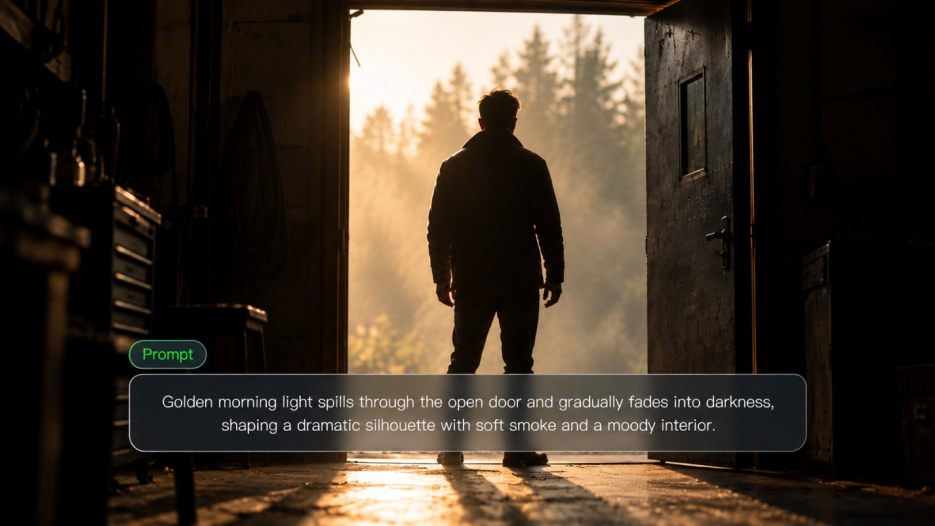
13.Silhouette
| Prompt: A figure standing in an open doorway, strong light behind them fading around the edges of the body, interior kept dark, high-contrast silhouette with a thin bright outline. |
14.Rim-Lit Portrait
| Prompt: A close portrait with a single light behind the subject's shoulder, a bright rim tracing the hair and jawline before fading into shadow, dark background, intimate and atmospheric. |
15.Atmospheric Scene
| Prompt: A person walking through morning fog, sunlight behind them creating a glowing outline that fades into the mist, foreground kept dim, soft and ethereal. |
How to Adjust Lighting and Shadows in an AI Image
Relighting works best when you know where the light should come from, how it should fall across the scene, and which parts of the image should stay consistent.
Step 1: Add Your Starting Image
Start with an image whose subject, framing, and overall composition already suit the result you want. If you are starting from scratch, you can establish the scene and its lighting together with text-to-image.
When working from a reference image, choose a version with clear subject details and a composition you already want to keep.
Step 2: Describe What the Light Should Do
For an existing image, keep AI photo editing prompts focused on the lighting change and any visual details you want to retain. A useful instruction usually covers the details that matter most:
- Direction: Where the light enters and which area it reaches first
- Light quality: Soft, diffused, hard, or direct
- Color: Warm, cool, neutral, or a specific hue
- Falloff: Where the brightness begins to fade and how gradual the transition should be
Once you have the lighting direction in mind, there is no need to rewrite the whole scene. Kling IMAGE 3.0 lets you work from an existing image and focus the edit on how the light and shadow should change.
| Reference Image | Side Lighting | Soft Light | Backlight | Colorful Lighting | Stage Lighting | Front Lighting | Cool-toned Lighting |
.png?x-oss-process=image/resize,w_1872) | .png?x-oss-process=image/resize,w_1872) | .png?x-oss-process=image/resize,w_1872) | .png?x-oss-process=image/resize,w_1872) | .png?x-oss-process=image/resize,w_1872) | .png?x-oss-process=image/resize,w_1872) | .png?x-oss-process=image/resize,w_1872) | .png?x-oss-process=image/resize,w_1872) |
| Prompt: Change the lighting and shadow to [ ] | |||||||
Step 3: Generate and Check the Lighting
Generate a version and look at the lighting first. Does it enter from the right place? Do the shadows follow it? Check the fade last, especially around the subject and frame edges.
The scene may already be close even if one lighting detail feels off. In that case, keep the parts that work and focus the next edit on the specific issue rather than changing the entire prompt.
Step 4: Refine One Detail at a Time
Small adjustments make it easier to judge what changed between versions. If the lighting misses the target, revise one detail first, such as the direction, falloff, color, or shadow strength, then generate again. You can continue from an existing result with an image-to-image AI workflow or make further targeted changes with the AI photo editor.
How to Improve Lighting Effect Prompts
Naming a lighting style alone still leaves several visual decisions open. Add spatial cues that show where the light starts, what it reaches first, and how it fades through the scene.
Describe the Fade as a Path
Treat the fade like movement across the frame. Say where the light arrives first, where it stays strongest, and where it drops away. Window light, for example, might hit the left side of a face, cross the cheek, then disappear into the darker background.
Use Clear Spatial References
Use the frame itself as a reference. Phrases such as upper left, behind the subject, near the frame edge, or toward the back wall tell the model where to place the light.
Compare:
- Vague: Warm cinematic lighting with soft shadows.
- More specific: Warm light entering from the upper left, falling across the subject and fading toward the darker right edge.
The second lighting effects prompt gives the AI image generator a clearer relationship between the source, subject, and darker areas.
Keep the Lighting Hierarchy Clear
Decide which light leads the scene. A portrait might use a warm window as the key light and only a faint cool fill on the shadow side. Give both sources equal emphasis and the intended fade may become harder to read.
Consider the Surface and Atmosphere
Light does not look the same across every scene. Glossy surfaces often produce more noticeable highlights and reflections, while fog, dust, glass, wet pavement, or textured walls may make the transition more visible. Adding one relevant environmental detail can make the lighting effect feel more connected to the scene.
For a neon street image, for example, mentioning wet pavement gives the colored light somewhere to reflect. A soft portrait may need no extra atmospheric effect at all.
Use Visual Guidance for Lighting That Is Hard to Describe
Some lighting directions take too many words to explain precisely. A visual mark can provide a clearer cue for angle, position, or color.
Kling IMAGE 3.0 can also use visual cues during image editing. For lighting changes, an arrow can indicate both the direction and color of the light, giving you a clearer way to guide effects that are difficult to describe precisely in text.
Reference Image | Prompt: Light the scene according to the color and direction of the arrow, then add a cake on the table. | Output |
.png?x-oss-process=image/resize,w_1872) | .png?x-oss-process=image/resize,w_1872) |
The End
Lighting feels more deliberate once the fade has a clear path across the frame. Start with one of these image lighting fades effect AI prompts, then change the direction, color, or falloff to fit the scene you have in mind. Kling IMAGE 3.0 gives you room to keep working on the light from there, whether you start with a new image or an existing one.
FAQs
Can AI fix bad lighting in photos?
Yes. AI tools can adjust brightness, shadows, color temperature, and light direction, or introduce a new lighting setup. Results depend on the source image and how clearly you describe the change you want.
How Do I Make Light Fade Gradually in an AI Image?
Describe both ends of the transition rather than the light alone. Say where illumination is strongest and where it should drop away, then add words such as gradual, smooth, or falling off softly. Naming a distance also helps; for example, light that fades before reaching the far wall or the opposite edge of the frame.
What Lighting Prompts Make AI Images Look Cinematic?
Cinematic lighting prompts often work better with a clear key-light direction and controlled contrast. Hard side light, backlighting, rim light, low-key setups, or volumetric light through fog can support different cinematic looks. For darker scenes, keep secondary fill restrained if you want the shadows to stay pronounced.
Can I Change the Lighting of an Existing AI Image?
Yes. If the image already has the composition you like, use it as a reference and focus the prompt on the lighting change. With Kling IMAGE 3.0, you can adjust the light and shadow setup and mention any subject or framing details you want to keep consistent.
What Are the Best AI Lighting Effects for Portraits?
Soft directional window light is a common choice for portraits because it creates a gradual transition across the face. Rim light can add separation from the background, warm low-angle light creates a softer glow, and harder side light can add stronger contrast and emphasize skin texture.